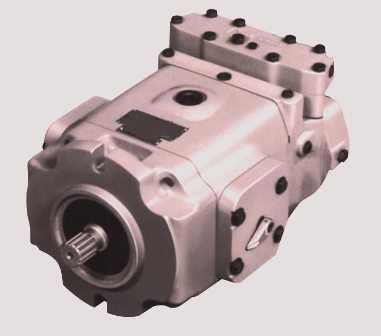
Denison Hydraulic Goldcup series 6C, 7A & 8A Axial Piston Pump Variable Displacement With Auxiliary Collection

Denison Hydraulic Goldcup series 6C, 7A & 8A Axial Piston Pump Variable Displacement With Auxiliary Collection
March 28, 2022 Comments Off on Denison Hydraulic Goldcup series 6C, 7A & 8A Axial Piston Pump Variable Displacement With Auxiliary CollectionPlace the cradle on an area that has been cleaned. Put the rocker cam and mark it to know where the cam and cradle need to align up. Next put an oring around the spacer and stick it in the vane seal. Put the check valve in the spacer and put together in between the two backup plates where the notch is. Situate the cartridge in he slot in the cam and do the other side also. Place the four hold down vane and springs in the slots of both sides of the control valve. Mount both control chambers on a clean area, making sure the grooves are faced up. Place the four steel balls in the counterbored holes at each end of the seal grooves.
Grease the seals and put in the seal grooves of the control chamber. The tapered side of the seal needs to be rammed in the grooves and the ends have to cover the steel balls. Next put the control chamber with the seal and balls put together, put together over the control vane. The seal needs to be right next to the cam. Turn the chamber til it passes over the control vane assy. Then you will need to turn it in the other direction til the 1/4″ dowel pins are pushed thru the chamber and in the cradle. Place chamber in on the other side the same way.
There are two sets of chamber covers to choose from. The set that has CW will need to go in a RH rotation and the CCW will need to go in a left hand rotation. When you put in the cover the tubing holes and tapped holes are at the top. Put the chamber cover on the control chambers and the dowel pins
Put your four screws in and tighten them up all equally. There are orings and plugs that go in each cover. The tubes are reamed into holes in all of the covers. Put them in there correctly, if not the ends might get larger and have a pinch in there.
If you have “P” or “D” models, place two orifice screws in the servo stem. If you have a “V” model only put one orifice in there. Next the servo plates need the screws to go thru the servo stem. The servo stem and orifice need to be right up next to the servo plate. You will need to put the stem and plate on the rocker cam input side at a 9:00 position on a “B” suffix. The “A” suffix is at 3:00. Have a firm enough torque on each screw, then put in set screws and they don’t need to be longer than the surface of the servo plate.

If more help is needed with this, call us at 800-361-0068
sales@htsrepair.com