Eaton Neutral Lockout Switches – Dissassembly and ID
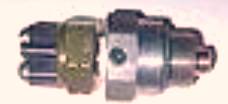
Eaton Neutral Lockout Switches – Dissassembly and ID
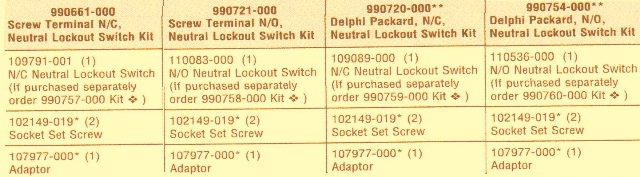
March 9, 2022 Comments Off on Eaton Neutral Lockout Switches – Dissassembly and IDOn the models that have the * looking icon next to them means that the kits that have adaptors, the threads on the switch have a high temp water resistant grease that is on there from the factory. And put more grease on when you put it on. You can get kits without the switch.
Adaptor Kit 990650-008
102749019 (2) Socket Set Screw……………………………………….connector p#12015792
107977-000 (1) Adaptor…………………………………………………….cable seat p#12015323
terminals p#12089040
If you need a mating connector and terminals they are not in the kit.
Take apart switch
Take off the wiring form the lockout switch.
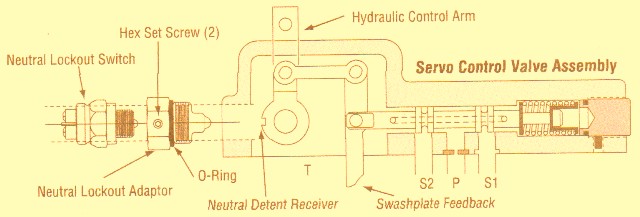
Take wrench and loosen the screws and take out the switch from the adaptor.
Take out the adapter from the servo control valve assy.
Switch ID
Take the switch from the adaptor.
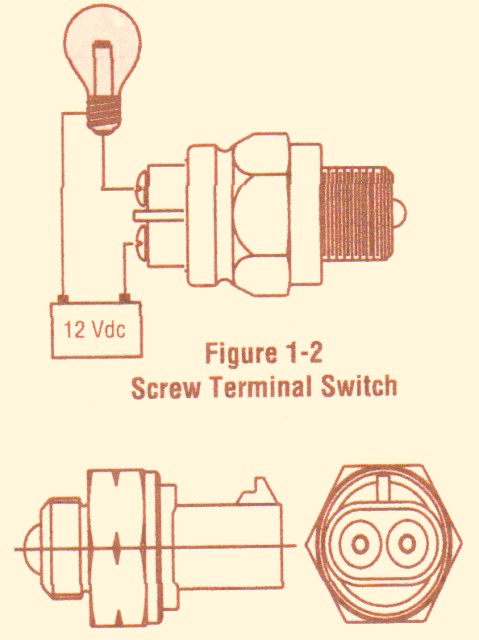
Put a test light on the switch terminals. If you use a multimeter put it on the ohms. If the light is on, it means zero ohms and if your light is off it means infinite ohms.
The ball at the end of the switch is not pushed in, when light is off, but when you have it pushed in, then it is a normal open switch. And when that statement is in reverse it is normal closed switch.
And try not to push in the ball where it is even with the housing, you could damage the switch.
Make sure you disconnect your battery on equipment when doing test, may shock you, make sure parking brakes are on or having the equipment moving at all. It could harm you while running these test.
Also, hydraulic fluid could possibly leak out of servo control valve while taking out the lockout switch and adaptor. Make sure to turn off the reservoir to the pump and drain it so the level is below the servo control valve.
If you need further help with this unit, call us at 800-361-0068
sales@htsrepair.com